-----------(OUT DATED)--------------
Area has been removed since patch 18.7.0
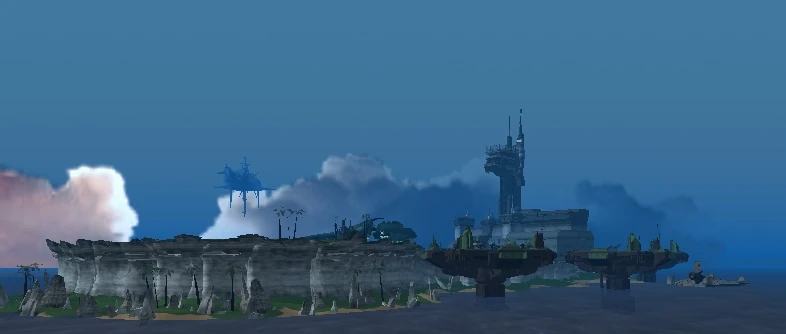
ICC Shuttleport (also known as "Newbie Island") is one of two places where players can start the game, the other is Nascense Training Grounds in the Shadowlands. This area was added with the release of the Alien Invasion expansion, and previously players started the game in faction 'backyards'.
The island is an area where players can get to know the game system and game elements with some ease before venturing off to interact with the rest of the player community. Factions, Quests, NPCs, Boss monsters, Tradeskills, combat, and other things are all available for exploration. Characters even have a chance to join Clan, Omni-Tek, or remain Neutral, and when they are ready, leave the island to go to one of those faction's Cities.
Walk Through[]
|
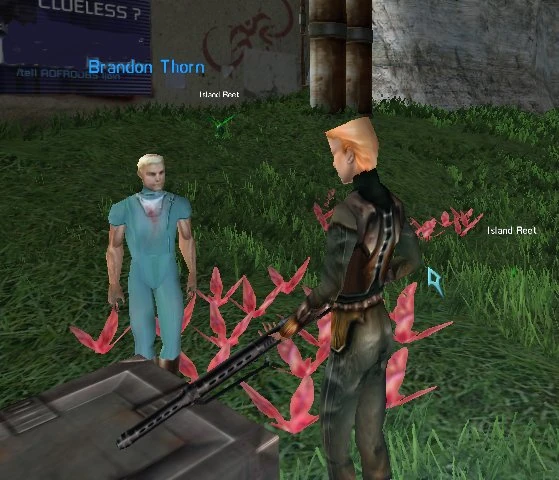
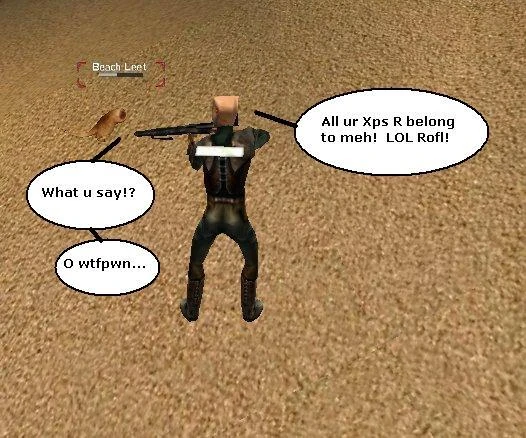
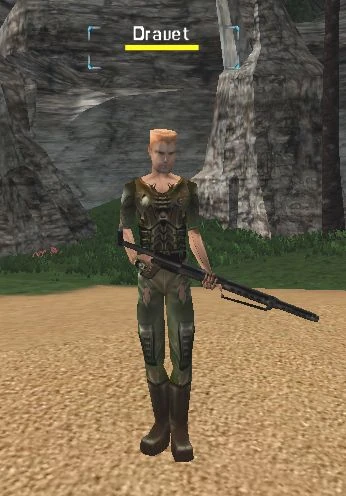
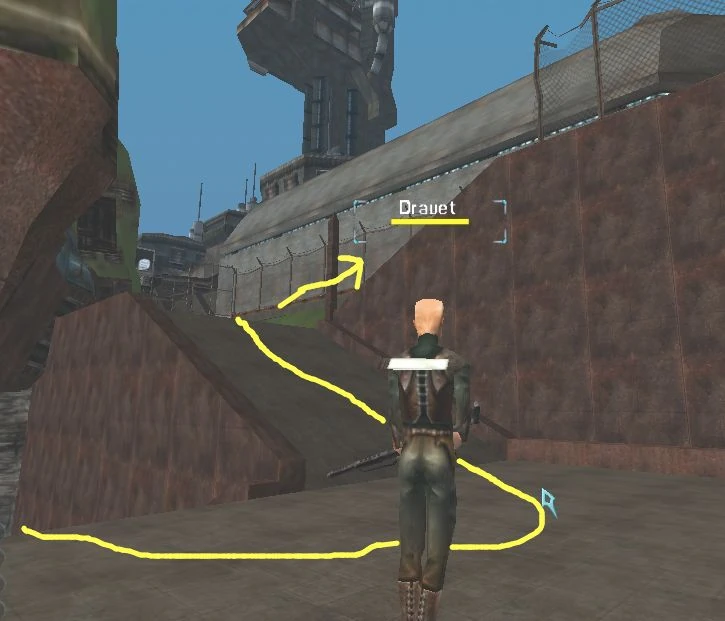
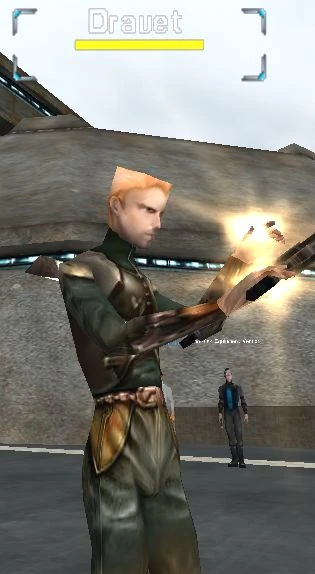
This section is a walk through of all the quests at the ICC Shuttle Port and should take you up several levels in the process. By following it you should be ready to leave without running into any problems on the main land. If you recall from the Beginner Guides section, we made a Soldier called 'Dravet' who is going to brave the epic trials of Newbie island. Unfortunately, the shuttle crash that brought us to this island has left Dravet a little disoriented and confused. It seems though that he is getting along with the natives and learning the local dialect... Anyway! We have nothing, no items, no equipment, no experience, no change of underwear. It's time to take a look around this place to see if anybody can help us get some bearings and figure out what we are doing here. There are weird animals running around all over the beach and sounds of distant gun fire in air, so it might be good to get our little soldier a gun pretty fast. Luckily, just walking north up the beach a little we run into Brandon Thorn, who looks like he might be able to help us. |
 |
Brandon Thorn[]
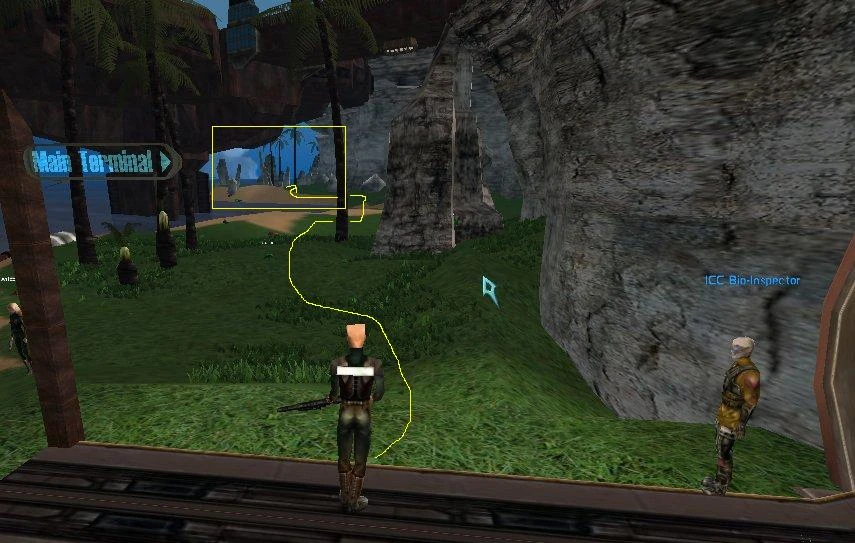
Brandon Thorn can be found at NPC position (1) on the Map
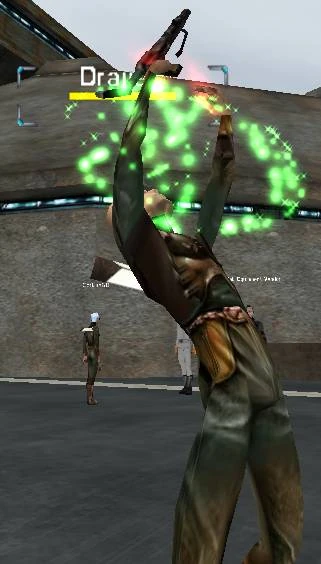
| When we talk to Brandon, he produces some equipment right into our inventory (shortcut key "I" to open), and we get enough experience to gain a level! Dravet is so happy he does a back flip for no reason at all! Ain't Nanobots cool? What’s more, we now have a weapon! Just this simple fact causes Dravet to start drooling and yammering something about the 'proletariat'. This is rectified by hitting him with a rolled up newspaper a couple of times and showing him how to actualy hold the thing (You can right click on your basic weapon in your inventory to auto-equip it). We also seem to have found a Nano Crystal in this mix of goodies. A Nano Crystal is a device that stores the holographic encoding of a complex program that instructs nanobots how to do... something? In this case our program (Dravet got "Body Boost", you might have a cooler one) increases our max health for a while. To upload the program, target yourself using the F1 shortcut key and right click on the crystal in your inventory, if you have the skills necessary to use it, the crystal should disappear and the program should appear in your programs menu. To use the program, select an appropriate target and click the program icon in the menu.
|
 |
Raising Skills[]

|
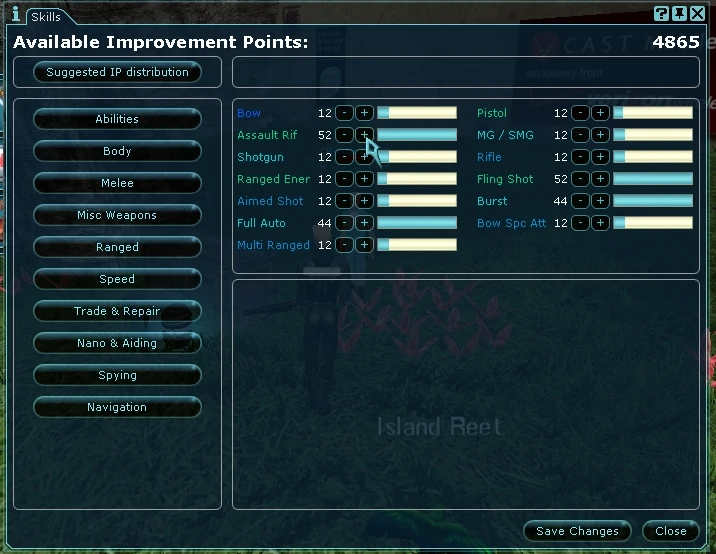
The Skill System is one of the most important aspects of the game, and represents the character's ability to utilize items, equipment, and nano programs in effective ways. What skills you have, and how high they are is even more important than what your level is in most cases. The little blue tab that appeared on the right side of the screen that Dravet was so curious about is an indicator that there are new Improvement Points (IPs) available to us at the level up, and clicking on it opens the skill view ( The skill view can also be opened and closed using the "U" shortcut key). There are many ways to approach the skill system, and the game even allows you to do a 'suggested distribution' up until level 20, but we are going to start by hand picking our skills. Keep in mind that you will never get enough IP to raise all of your skills to the maximum level and that your profession and breed change how much skills cost. In the end you will have to be choosy about what skills you buy because there are very limited ways of changing them once your have spent your IP. The first thing that we are going to look at is the Abilities skills, which represent the character's base abilities which all the other skills are based on. Most skills are based on one or two of these abilities, so they will get bonus points in those skills when these abilities are high, but you will not be able to raise the dependent skills if one or more of the abilities are not high enough. The costs for your Abilities are determined by your breed, and since Dravet is a Solitus, all his are the same light blue color. Darker blue skills cost more and you can buy less of, while lighter green skills are cheaper and you can buy more of. We start off by raising all of Dravet's Abilities to the max to stat off with a good base for raising other skills, in fact we will max out all his Abilities until he reaches level 10. In the Body tab we raise Dravet's Body Dev skill to the max because it has an effect on how many health points he has. We skipped the Melee and Misc weapons tab because we already know Dravet likes his guns, so we move directly to the Ranged Weapons tab and max Dravet's Assault Rifle, Fling Shot, and Burst Skills since the weapon we have uses the Assault rifle skill to hit things, and also has a fling shot and burst ability that cycle faster with higher skill. Moving to the Speed tab we max the Ranged Ini skill so we can shoot our gun faster, and the Run Speed skill so we can move around the island faster. Under the Tradeskills tab we will max out our Computer Literacy because it effects what computer decks we can use and how much we can buy and sell things for, not very useful right at this moment but it will come in handy latter. In fact we will max Comp Lit skill every level till we get to 1000 skill. In the Nano and Aiding tab we will max our First Aid and Treatment skills so we can use better med kits and stims, treatment also determines what Implants you can use so you will want to max treatment at every level. We don't have very many nano programs right now, so we don't need many nano skills, and the rest of the tabs don't have skills that seem useful and they are expensive to buy, so for the moment we are going to save the rest of our IP till we need it. We click the Save Changes button to make the additions permanent and close the window by pressing "U". Your character will probably be different, but you will always want to increase the skills you use most and the Abilities that support them. To find those out, check the descriptions of the Weapons, Items, and Nano Programs you use a lot to check what skills, special attacks, and abilities they use and than raise those as needed. |
|
Mission: Finding Animals[]
Find Mission |
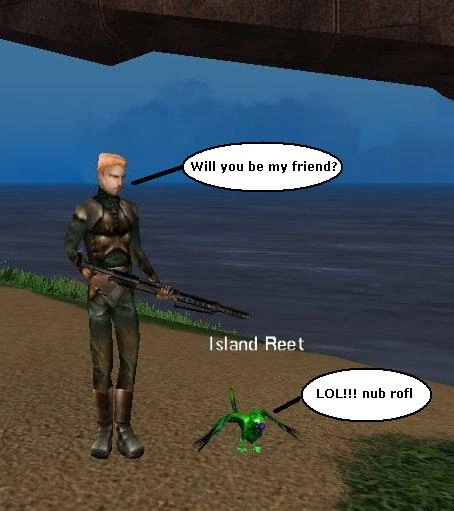
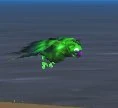
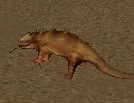
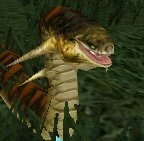
Objective: This mission is fairly easy and involves finding four low level monsters and targeting each of them. The monsters must be targeted in the correct order and are depicted to the right: a Beach Leet, an Island Reet, a Surf Lizard, and a Shore Snake. An easy way to do this is to step back a bit from Brandon Thorn and press Tab multiple times to cycle through the available targets. A tone will sound when you find each animal (which means you have completed a mission). When you have found all of them go back and talk to Brandon Thorn
Reward: The Light Bar is a Utility slot item that helps to illuminate the area around the character, and is extremely useful in the many dark areas of the game. |
|

Mission: Killing Animals[]
Kill Mission |
Objective: In order to test our reflexes and combat ability, Brandon Thorn wants use to go kill one of each of the animals we just found in the same order: a Beach Leet, an Island Reet, a Surf Lizard, and a Shore Snake. This is also a very easy operation that not only gives use experience from the mission, but also for killing the animals! Dravet got the hang of this mission right away and took out some pent up aggression from his encounter with the reet earlier. When you have killed all the monsters, return to Brandon Thorn. Reward: |
|
Mission: Take the Belt to Antonio Stacklund[]
Bring Mission |
Objective: Brandon Thorn found this belt but doesn't know what it is good for, though he suspects that Vendor Antonio Stacklund might be able to help you identify it and explain how it is used. To find Mr. Stacklund we need to head up north from where Thorn is, but we obviously can't go directly north because of the big cliff face! Much to Dravet's chagrin and not for lack of trying either. So we decided to head west along the shore to try and find another way up. Reward: 50 Credits, 50 XP |
Health and Nano Kits[]
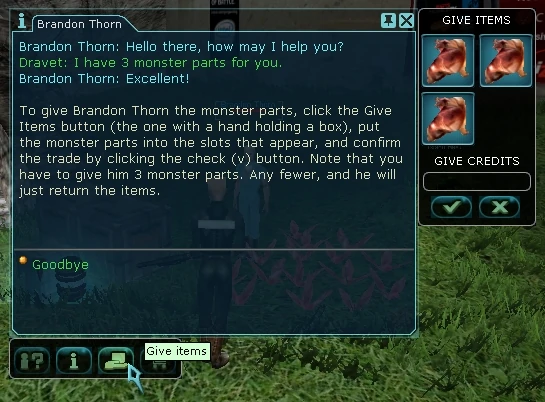
Before we left, Brandon reminded us that he is still looking for 'monster parts' to make medical kits and supplies out of. We didn't know what these were at first but he points out that they were little orange blobs of flesh, something that we had been picking up and letting Dravet chew on. Seems that they would be better suited for making medical supplies so we give three that we have laying around to Brandon and he gives us a bundle of supplies.
![]() Basic Nano Recharger(Auno)
Basic Nano Recharger(Auno)
![]() Simple First-Aid Kit(Auno)
Simple First-Aid Kit(Auno)
He ended up giving us a Treatment Laboratory and Nano Recharger, each with 50 Charges; and a Simple First-aid Kit and a Simple Nano Kit, each with 25 Charges. Here we noticed that we already had some of these laying about in our inventory from when Brandon original gave us our starting equipment and had never bothered to examine them. After reading the labels ( You can examine objects by holding shift and Left Mouse Clicking the object) we found that to use the Treatment Laboratory and Nano Recharger you need to sit on the ground, target yourself, and right click the charger in your inventory. The First Aid kit and Nano Kit, you only need to target yourself and right click the kit. Obviously, the kits give less of a boost than the larger items, but the advantage of the kits is that they can be used in combat and you do not have to sit down. Using the Laboratory locks your Treatment skill for a short time, so you cannot use any other items that require the treatment skill to activate their abilities in that time, the kits use the First Aid skill, and for the Nano Rechargers, they lock the Time-Space alteration skill.
We also noticed that Brandon gave us kits at a Quality Level (QL) equal to our level, and he said that if we came back latter he would give us better ones when we leveled. So after loading up on these kits we continued on down the shore.
The ICC Bio-Inspector[]
ICC Bio-Inspector can be found at NPC position (2) on the Map
| While we were going up the shore, Dravet decided to take some pot shots at the local wild life for practice. After a couple of kills he can managed to dig up some scrap peices of armor and another from all the XP he was getting. Who knows why leets and small lizards were carrying around pairs of pants and boots; maybe its some sort of obscure Rubi-Ka fashion industry? In any case we kept moving up the shore and we ran into the ICC Bio-Inspector near a big pipe like tunnel in the cliff face. He seems like the talkative sort so we decided to stop and chat. After talking to him a couple of minutes we find out that he is in charge of keeping track of the wild life on the island so it doesn't get out of hand, and oh by the way he has a job for us... |
 |
Mission: The Cull[]
Kill Mission |
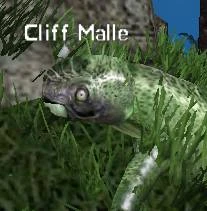
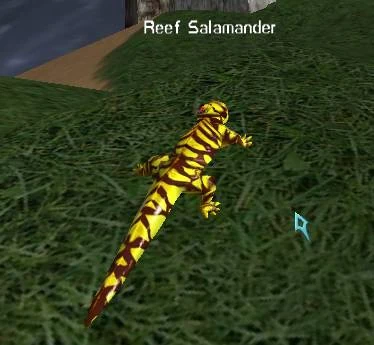
Objective: We may not understand how fast animals on Rubi-Ka breed, but we are certain of another thing: we can kill them. On the Inspector's direction we head off to the west up the shore looking for Reef Salamanders first. When we get to the western beach and start seeing the creatures there, we start to understand what the Inspector meant: this whole place is over run! We start off by killing our three salamanders and then move onto Tropical Stalkers and then Cliff Malles without so much as a blink. We also ran into some Roller Rats which seemed to jump out of no where and attack us when we got near them. Sometimes they would pop up while fighting another animal, but we made good use of Brandon's First-Aid kits to keep our health in the red. While rummaging around the corpses we found some interesting items that might be useful, such as Stalker Legs, Bone Plates, Roller Rat Intestines, Blue Corundum, and Yellow Corundum. We decided to take these with us to see if anybody would be willing to buy random animal bits latter. We than headed back to the ICC Bio-Inspector to claim our reward. Reward: The Shiny Band is a piece of armor that goes on your wrist and adds 20 to your maximum health. You can auto-equip it by right clicking on it in your inventory. |
|

Mission: Find the Leaders[]
Find Mission |
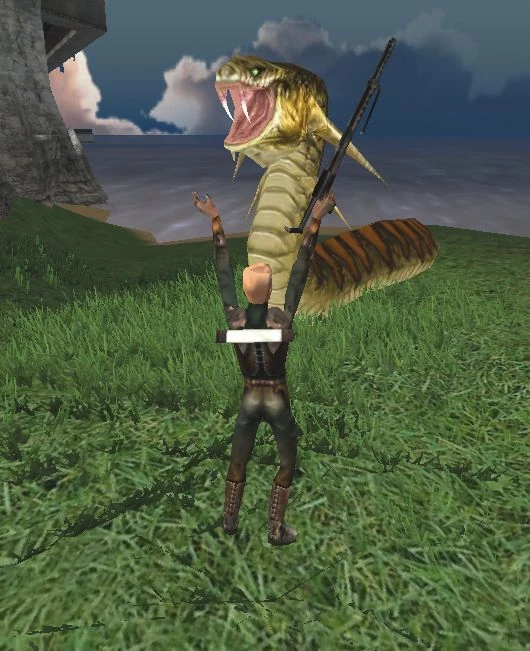
Objective: While we could go back to looking for Antonio Stacklund we decided to see if the ICC Bio-Inspector had anything else for us to do, and as luck would have it, he does! This time he wants us to go and find the leaders of each of the beach animals. The Inspector tells us that these should be much bigger versions of each of the monsters. He thinks that the first one should be back down the shore to the east, beyond were Brandon Thorn is at. Sure, whatever... bigger, right... how big can a Tiny little snake get? Pretty big it seems! We wandered up to the first boss and targeted it to get credit for the mission, but Dravet didn't just stop there. He wanted snake for dinner tonight, and that snake looks like it should have some pretty big steaks on it! So, we also killed the thing and found that it was carrying some armor (probably from all the other adventurers that it ate...ewww). We rummaged through it for the best pieces and moved on to the next boss. Each of the bosses can be found by moving up the shore westward and each are depicted on the Map. After tagging all the bosses in the order that the Inspector wanted us to, and killing some for their armor, we headed back for our reward. Reward: The Range Meter is a device that goes in one of your HUD equipment slots and increases your chance to score a critical hit, and the range on ranged weapons, but you need to have at least 30 perception skill to use it, which is a small price to pay. This item is useful for everybody, even melee professions, because of the critical hit bonus. |
|
Understanding Armor[]
|
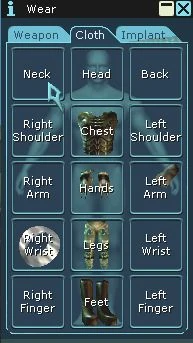
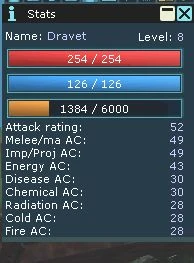
Armor is gear that you use to keep yourself from taking damage. The way that armor in Anarchy Online works is that for every ten points of total AC you have, it reduces the max damage of a weapon by 1 point down to the minimum damage. So if you have a weapon that does 1-25 damage and the thing you are shooting has 100 total AC, your weapon would really only do 1-15 damage. There are multiple different damage types and AC ratings for all of them, and most armors cover a couple types of damage really well, and the others are not so amazing. Your AC ratings come from the total AC given by all of your armor pieces. You can see your totals in the stats window that can be opened by using Ctrl + 9. You can also see what armor you are wearing in your Wear window that opens using Ctrl + 1, in the middle tab called cloth. The main armor pieces that you will find are Head, Chest, Legs, Hands, Feet, Right Arm, and Left Arm. There is also protection offered through Back and Shoulder armor, but those parts are much more rare. Items that go in your Wrists tend to be bracers and bracelets that offer bonuses like extra damage or special types of reflection shielding. Rings do a variety of effects but most commonly have damage bonuses that add to both the min and max damage of a weapon. The Neck items vary in effect, but the sided factions have special 'Merit Boards' that you can put in your neck slot that gives large bonuses to as you gain faction tokens. There are many different types of armor sets and they range in their Quality Level (QL), AC Ratings, and Requirements to use them. Almost all Armor requires amounts of base abilities to use, so its important that you use armor that your breed and profession emphasize. The AC rating of an armor piece is determined by its QL and Armor Set. The higher the QL of the armor, the higher the AC value, but the armor set determines how much AC the armor piece will have per QL. So some armors are just naturally better than other types of armor, and some have large 'holes' in the AC where the armor is weak against a type of attack. One strategy for getting around AC holes is using different types of armor from different sets to get an even coverage. Another strategy is to just use armor that evenly covers all AC equally, the problem with that is most of that armor is hard to find or requires higher levels to get. You should always examine the armor pieces you find (holding shift and right mouse Clicking the armor piece in your inventory) and compare it to what you have before you integrate it into your armor setup. For example: Nail Armor is a very poor armor so even if you find a QL 20 Nail Armor Chest piece, it will still be worse than your QL 10 Flax Armor Jacket. |
|
Mission: Talk to Adri Afeli[]
Find Mission |
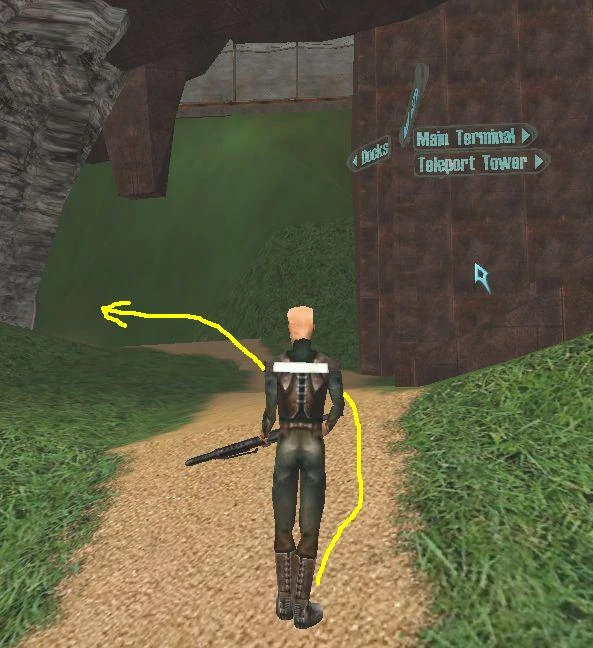
Objective: After we shuffle through our armor, the ICC Bio-Inspector mentions that Adri Afeli might have some more jobs for us to do, if we were interested, and directs us in his direction. To find Adri we need to go through the set of pipes right by the Inspector and than follow the path around to the left after we get out of them. Dravet noted though that there is a ramp going up to the right, and Brandon Thorn mentioned that we need to go up to the main terminal to find Antonio Stacklund, so we should remember that for latter. Moving on, we go through another tunnel and find Adri right on the other side. Reward: 50 Credits, 50 XP |
|
Adri Afeli[]
Adri Afeli can be found at NPC position (6) on the Map
| When we went over to talk to Adri Afeli, he actualy greeted us first! It would seem that Adri is an enterprising individual who happened to wind up on the Island and 'make it', by figuring out some ways to do basic weapon upgrades for the new arrivals. After having lots of experiance with his own assault rifle, Dravet was just drooling at the thought of having an even better version. Since Adri did not want to share the secret of how to make the upgrades, we asked him if there was anything we could do for him so he could upgrade our gun. So he gave us a list and off we go! | 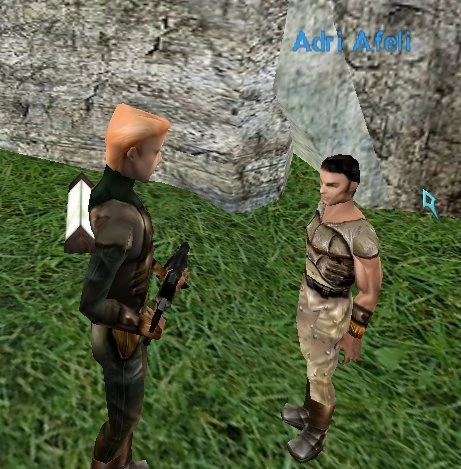 |
Mission: Weapon Components[]
Bring Mission |
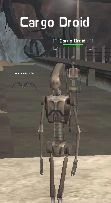
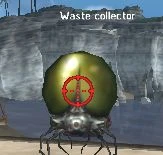
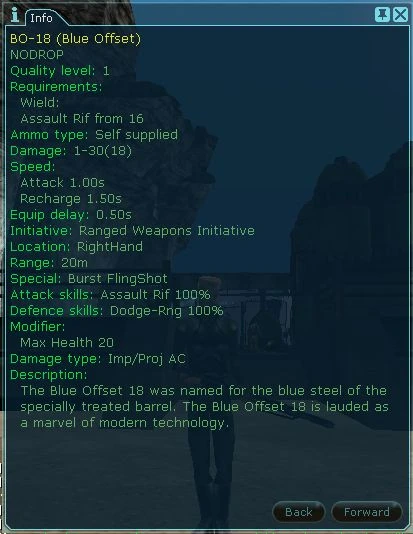
Objective: Adri basicaly gave us a shopping list of items to find for him, so this mission will be slightly different than most of the previous ones because we can get the components in any order, but we just have to bring Adri back all of them. After looking at the list (Crtl+5 to open the mission window) we noticed that we had some of the components all ready rolling around in our sack from doing work for the ICC Bio-Inspector, namely the Stalker Limb, Bone Plates, and Roller Rat Intestines. Now all we need to do is find a Power Supply and Compression Chamber. Those don't sound squishy, so we decided to head north towards the dock to look for some robot type creatures that we could maybe... break and pillage their bits for parts. After some shooting around, we managed to find out that the Cargo Droids will occasionaly drop a Power Supply and the Waste Collector bots will also sometime be found with Compression Chamber, so with these in hand we headed back to Adri to talk to him. Just like with Brandon Thorn, Adri wants us to give him the items. Reward: The weapon we got was a 'BO-18' assualt rifle, each basic weapon has a different upgraded weapon associated with it, yours might be cooler than ours. |
|
Weapons, Special Attacks, and Damage[]
|
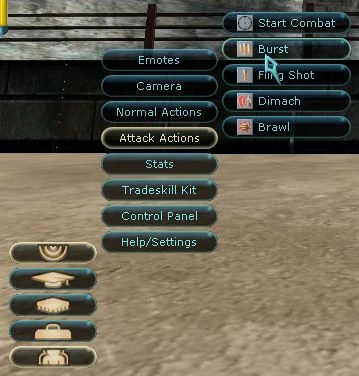
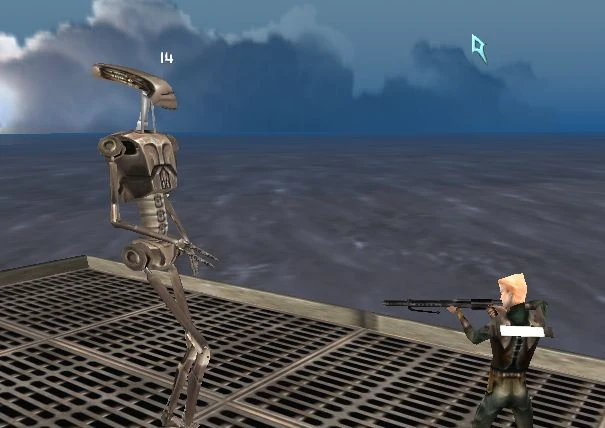
Weapons are a fairly important part of the game and game play (Dravet's favorite part actualy), so it might be important with our new weapon to take a look at some of the factors that make weapons work and determine damage. Weapons hit targets based on the attack skill that the weapon uses, in this case: Assualt Rifle. Dravet's Assualt Rifle Skill determines his base attack rating, and when he attacks, on every shot his attack rating is compared to the target's ability to dodge the shot. The mechanic for dodging is not entirely known, but it is very hard to dodge attacks and requires extremely high dodge skills, so each weapon has a specific dodge skill that it checks against in its description (Dodge Ranged is the skill Dravet's gun uses). Another thing that Attack rating does is help in adding damage to the weapon for the attack rating over what is needed to hit the target, and aids to increase the chance of a critical hit if the target's dodge ability is very low and your attack rating is very high. Damage Range, which is made up of a Minimum Damage and Maximum Damage, has a very large part to play in weapons. As we saw with armor, high AC can effectively reduce the max damage of the weapon. There are peices of equipment like rings, bracers, and some armor that actualy give a damage modifier to weapons being used which adds its modifier to both the min and max damage. The part that plays into how much damage a weapon does is the Attack Time and Recharge Time, the attack time being how much time is needed to set up an attack with the weapon and the recharge time is how much time is needed to follow through with the attack. From this there are generaly two types of weapons: the first from the classic game that have a big damage range but are slower to attack, so are good on mobs that have less AC, and the weapons that have a fast cycle, high min damage, low, max damage and are good against mobs which have high AC. One extremely important note to keep close to your heart is that most professions in Anarchy Online are geared for using one or two different weapons because of the low cost o the skill for the profession, buffing programs, perks, or other things. With the skills system though you can use just about any weapon you want, but that does not mean it will always be as good as a profession who specilizes in that type of weapon. A good way to tell if a weapon is good for your profession is to first look at the Skill Dependency Chart to see what is the cheapest, than look at your profession's nano list to see what your profession can buff. Otherwise, ask more experianced members of your profession for advice, and stick to the upgraded starter weapon you have till you can. Special Attacks are a group of attack actions that are enabled by the weapon you are using (and yes, fists are considered 'a weapon'). Generaly speaking, this attacks are seperate from the normal attack cycle so can be used between normal attacks, though special attacks on weapons that use ammunition spend ammo when used (such as Full Auto). Most special attacks have a 'recharge time' that is based on the skill in the special attack and the weapons's recharge time. Special attacks can also be used during nano casting without interupting the program activation. To use the special attacks that your weapon enables, you should look in your attack actions menu, in the actions menu. Unless you are using fists or a weapons that enables Diamach or Brawl, you should disregard those icons as they are often present for any weapon, but don't do anything. If you want to make a copy of the action for your quick bar, you can click and hold the action button, than drag it to the quick bar. For more indepth coverage of special attacks please see the main article on subject: Special Attacks There are several damage types in Anarchy Online that operate on different continums from each other. Damage type is generaly inherit in the weapon you are using, and can be identified in the weapon's description as what sort of AC is is measured against for damage dealing. Each damage type is only enhanced by items that specificaly enhance that damage, so a ring that adds energy damage will not make your sword do melee and energy damage, only add to any energy damage it already deals. Damage is generaly an important consideration in a weapon because many monsters, creatures, and mobs have high protection levels against a type of damage or have a weak protection against others. The most common damage types are Melee, Projectile, and Energy, but some weapons also deal Cold, Fire, Chemical, Poison/Disease, or Radiation damage. |
|
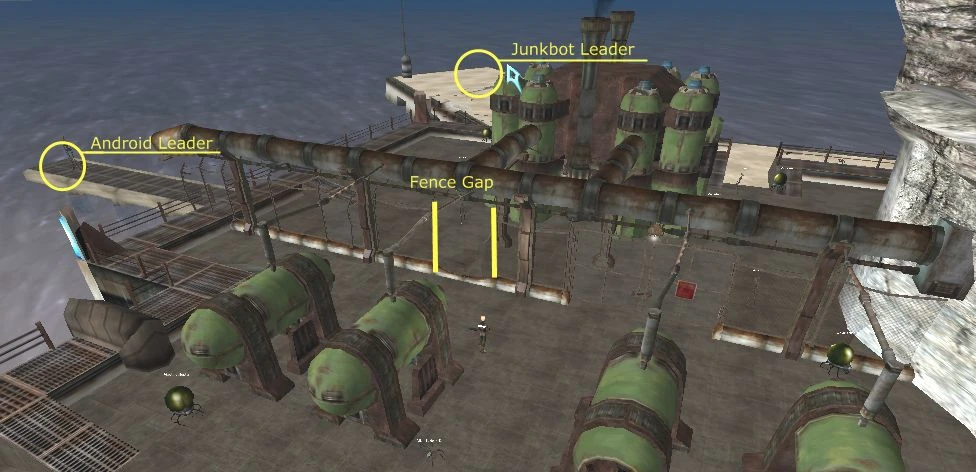
Mission: Just Business[]
Kill Mission |
Objective: Although we should really be moving on to find Antonio Stacklund, Dravet likes breaking things so we asked if there was anything else he had for us to do, and as luck would have it, he does. This is the kind of mission we are used to now: Kill, Kill, Kill. Adri wants us to get rid of 3 of the Cargo Droids and 3 of the Waste Collectors because they are 'malfuctioning'. After that he asks that we take on the robot leaders of the docks: the Android Leader and the Junk Bot leader. To find them you need to head up the small ramp to the right of where you first find the robots and go through a gap in the fence, and you should find them down on their own dock areas. Near the Junkbot Leader there are alot of Zix, those little alien spiders wandering about, so if you have the Alien Invasion expansion, this is a good place to get the AXP for your alien levels, otherwise just stomp the bosses, rifle through their bits, and head back to Adri triumphant! Reward: The backpack can be used to store extra stuff in, like extra inventory space. To open the backpack, right click on it in your inventory. All types of containers and backpacks have 21 space to put extra gear and items in, so are extremely useful for carrying around all your loot from a mission! |
|
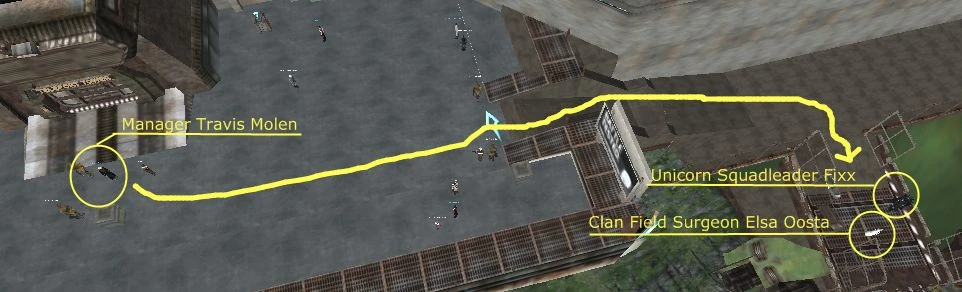
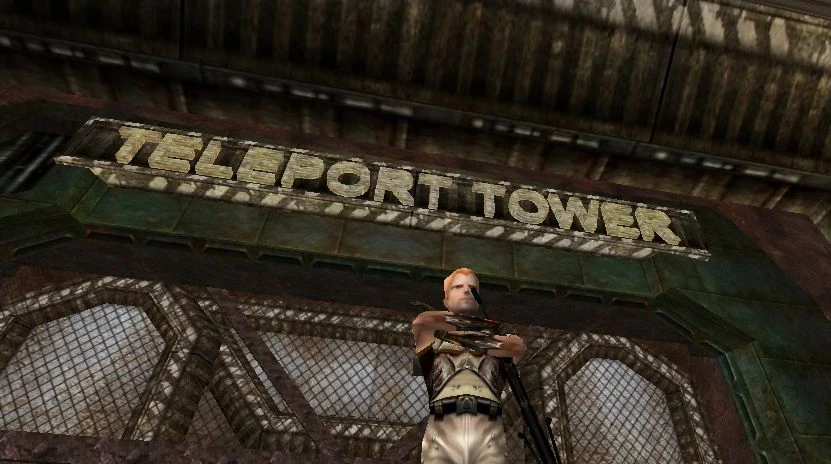
Mission: Talk to Manager Travis Molen[]
Find Mission |
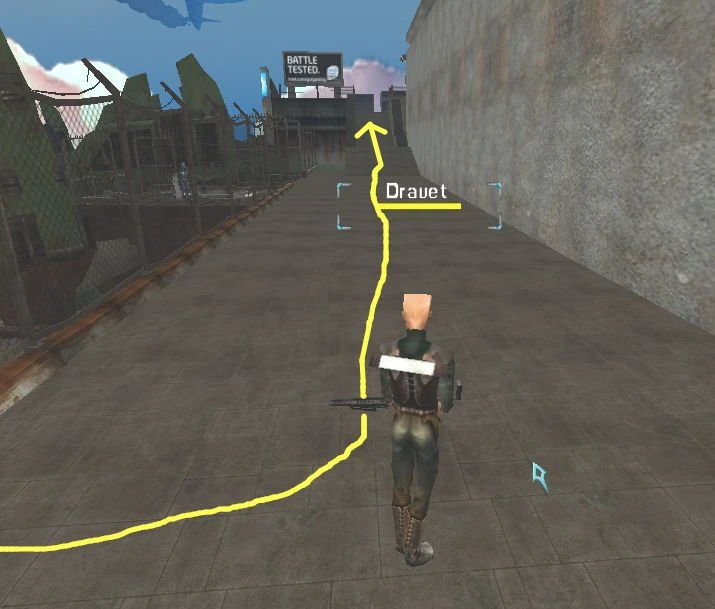
Objective: Since Adri is out of jobs for us, he suggests that we go visit Travis Molen and pester him a while. To get there we go back through the pipe and take the ramp we saw earlier up to the top level of the island and follow the walkway straight up towards the giant tower there. You might notice a weird guy in black armor and a bald lady in a white robe to your left as you head up to see Travis, but they don't seem to be the talkative type... So, we prod Dravet and continue on up the last ramp to find Travis Molen. Reward: 50 Credits, 50 XP |
|
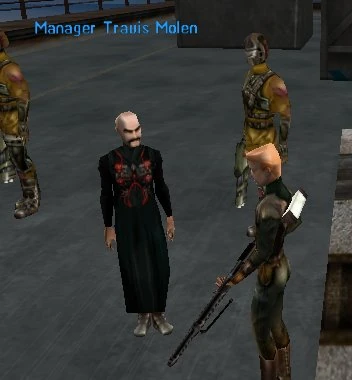
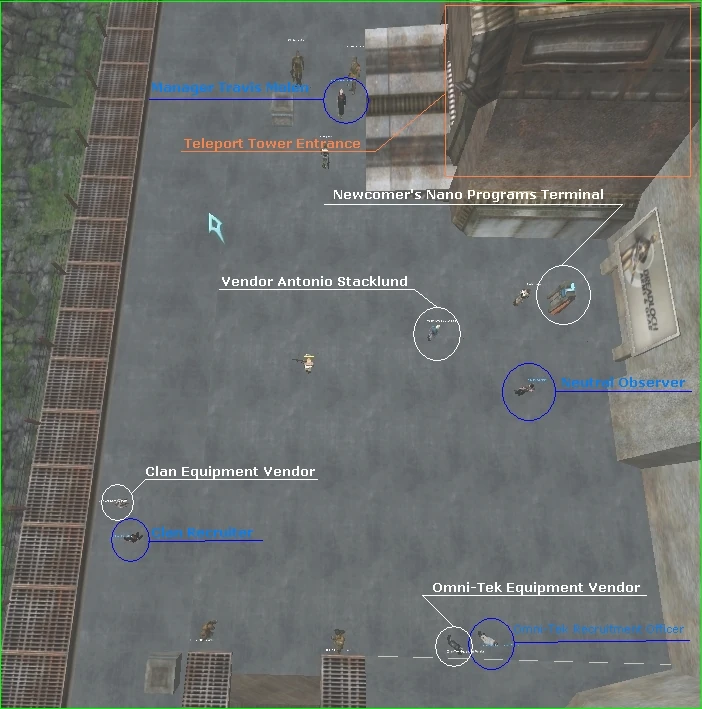
Manager Travis Molen[]
Travis Molen can be found at NPC position (5) on the Map
| Manager Travis Molen is extremely stressed out. Not only have the aliens been attacking incoming shuttles from the Morning Star Spacestation and the area constantly, but Omni-Tek and the Clans have sent 'help' to try and aid the situation. Help with has just managed to complicate all the problems at the shuttle port to the point of exhaustion. Its no surprise that Molen is not exactly thrilled to see us when we walk up, but we try and strike up a conversation and see if he has anything for us to do, since all the missions given by the other people we have met so far have been good training experiances and netted us some fine loot. With Mr. Molen being flanked by two ICC guards we decided to be very polite about any possible jobs. After a couple moments though he tells us he has some tasks that we could do to get ourselves some extra Newcomer Armor, and he also needs us to go talk to both the Clan Medic and the OT squadleader for updates on the battle. While Dravet was all for the mention of 'battle', we decided to go for the armor first, seeing as how we may need it!. We also noted that Vendor Antonio Stacklund is standing around up here as well, so you could talk to him before we go to help Molen or when we get back. |
 |
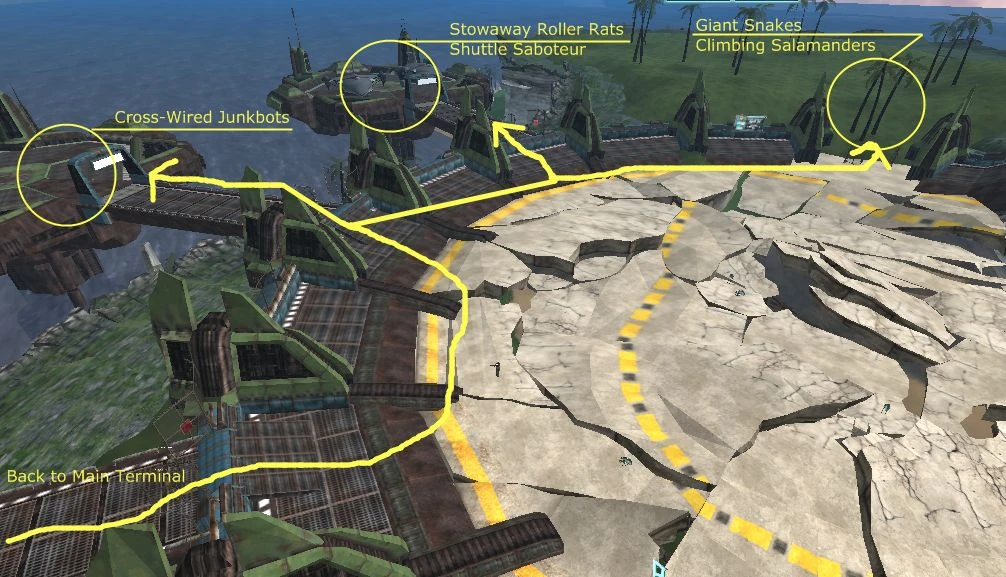
Mission: Unsightly Tasks[]
Kill Mission |
Objective: This is actualy a group of 5 seperate missions, but you should speak to Travis Molen till he gives you all of them so we can complete them while we are out. All of the locations for these mission objectives are noted on the Map in yellow. First, thing is that we need to head back south from where Molen is to find some Cross-Wired Junkbots and take out 3 of them. Next we turn around and head out towards the main landing pad. Yeah, the one with all the aliens on it, thats it... We managed to avoid most of the aliens by running around the outside of the landing pad and then going to one of the sub landing pads to kill 3 Stowaway Rollerrats and stomp a Shuttle Saboteur while we are there. From there we run out screaming like a little girl to the west where we can find more Giant Snakes and Climbing Salamanders running rampant. After killing 3 of each we can head back around the outside of the area to Molen to claim our reward. Reward: The Newcomer's Armor comes as a suit of QL 5 armor, which is pretty nice, but is without head gear. To see the full stats go here. |
|
Mission: Talk to the Unicorn Squadleader
Mission: Talk to Clan Field Surgeon[]
Find Mission |
Objective: These two missions are for finding different people but they are basicaly the same. What you need to do is go find each of these people and bring back a report from each of them for Travis Molen. You can find the information about how to tease a report out of each of them below in their own sections. Reward: 350 Credits, 180 XP (for each Mission) |
|
Omni Unicorn Squadleader Fixx[]
Fixx can be found at NPC position (4) on the Map
| Unicorn Squadleader Fixx is not a friendly sort of person, before he would even talk to us, we had to have been sent directly by Travis Molen. Even than he seems to think that we are some sort of soldier in his command... well, Dravet is a soldier but we are not really sure if he takes orders well. In any case, after talking to this impossing figure in black armor for a little bit we some how got roped into another quest so we could get the Unicorn status report! | 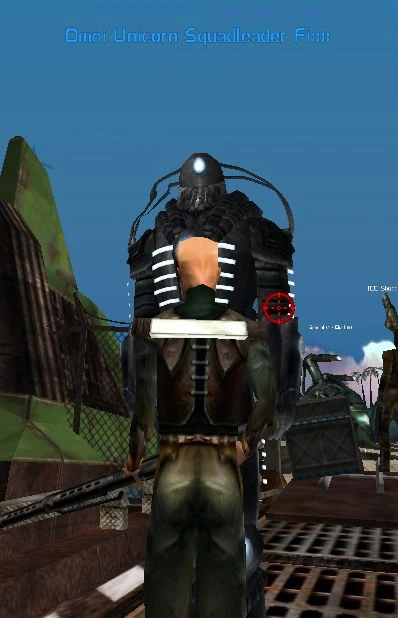 |
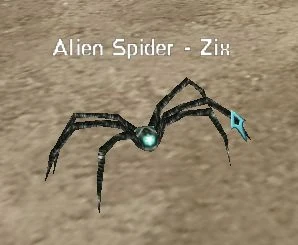
Mission: Kill the Invaders[]
| File:11330.png Kill Mission |
Objective: Now this is the sort of mission that Dravet likes: monster stomping. Since these monsters are green and from another planet they are twice as cool to kill! If you recall, we actualy saw a lot of these wandering around the docks with the Cargo Droids and Waste Collectors, so we take a leap over the side of the platform that Fixx is standing on and head to whomp some bugs! After doing all the previous quests and some reandom killing, you should be at a good enough level where this is not a problem for you, so step on three spiders and return to Fixx for a reward. Reward: Keep in mind that after you complete the mission for fixx and get the shoulderpad, you need to ask him for the status report or he wont give it to you. The shoulderpad is also locked so that only players sided to Omni-Tek can use it. We will cover faction latter on. When you get the Status Report you will get another mission to return to Travis Molen for another reward. |
|
Clan Field Surgeon Elsa Oosta[]
Elsa Oosta can be found at NPC position (3) on the Map
| Clan Field Surgeon Elsa Oosta is also too busy to be talked to casualy, but after being sent by Travis Molen she opened up to us a bit. Elsa is quite a bit nicer than Fixx, but she has a tendency to ramble on and talk to herself. If you ask, she will also tell you what she thinks of the Unicorns, not too highly either. Elsa Oosta is from the Clans, which is a faction made up of related groups and organizations that oppose Omni-Tek control of the planet. In the end of the talk, though she ropes us into another mission to help the poor and wounded of Rubi-Ka. Yay! | 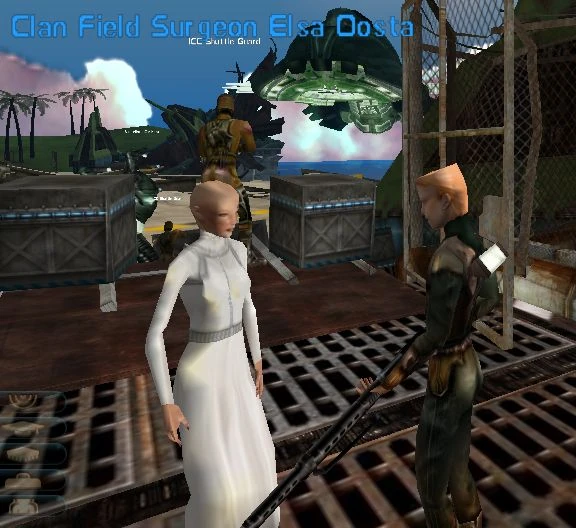 |
Mission: Compare Lifeforms[]
Find Mission |
Objective: Elsa Oosta wants us to help her compare the fields of energy around the Aliens and those of normal Rubi-Ka life forms, to do this she gives us a scanner to carry around in our inventory. This missions is fairly simple really, all we need to do is find an Alien Spider - Zix, target it, find a Reef Salamander, target it, and bring the Scanner back to Elsa. The Zix are located on the docks near Adri Afeli, and we saw a lot of them doing work for Fixx, and the Salamanders are located on the west beach, we shot quite a few working for the ICC Bio-Inspector. Reward: This shoulderpad is locked to the Clan side, and since we are Neutral right now, we cannot use it. We will cover faction a little bit latter. By getting the status report you also get a mission to return to Travis Molen for another reward. |
|
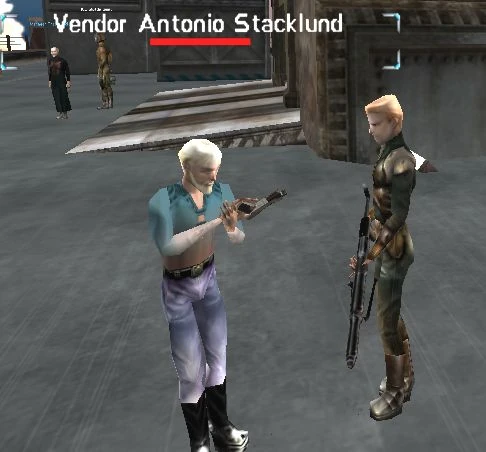
Vendor Antonio Stacklund[]
| Finally! We have come all this way and we can finaly talk to Antonio Stacklund like Brandon Thorn suggested we do! Mr. Stacklund is an extremely enterprising merchant and can provide many sorts of tools, weapons, and armor to all the hopelessly lost and stranded people around the island. What a perfect buisness opertunity! First thing we need to do though is show him the belt we were given by Brandon. He examples to us that the belt is actualy a computer for helping organize our nano programs, so he gives back the belt and throws in a NCU memory chip with it. Reward: Despite all of Adri Afeli's secrecy, it seems that Antonio has also stumbled upon a method for upgrading starter weapons, but it requires a tradeskill process. Luckily, he sells all the different types of starting weapons so if you are curious about different weapon types you can try them all out if you have enough time. Nearby, Mr. Stacklund is a small automated vendor called Newcomer's Nano Programs which sells prepackaged groups of nano programs for each profession. Since we now have some good cash from doing quests and missions for people around the island we can afford to buy one for our profession. You should only buy the container for your profession though, since all nano program crystals are hard coded to only work for those professions. |
|
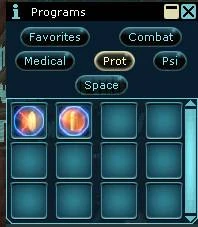
NCU and Nano Programs[]
|
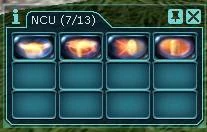
The magic of Anarchy Online is technology: all characters have a nearly invisible cloud of nanobots floating around them that they can command with a device fused to their brainstem called a 'Nano Controller Unit'. Each program that a character has can be executed by the nanobots to perform some amazing task like transforming somebody into an animal, Instantly healing them, causing massive explosions, or (in Dravet's case) forming specialized sheilds and protective barriers. Each nanoprogram run takes points out of the character's nano pool, which represents the amount of nanobots that are just hanging out, ready to do the bidding of the character. Your nano points can be rebuilt with specialized kits and rechargers. There are five major schools of nano programs: Medical, Combat, Space, Psi, and Protection, and each program fits into one of those schools; on top of that each profession has their own seperate and unique program list that has programs in each category. Some professions like Nano-Technitions or Doctors rely heavily on their nano programs to the point where normal weapons are a secondary concern. To use a program that you have uploaded to your NCU from a crystal, you first need to open the program menu (shortcut: Ctrl + 8) and find the program you want to use under the the school its in. When you find the program you need to make sure you have selected the correct target, some nano programs only effect the caster, others work in area effects (AE or AoE). When that is done you click the icon and the program will begin to be executed. You cannot do anything else while excuting a program other than use special attacks, and if you move the program will cancel. The speed you cast at is dependent on your Nano Initiative Skill in the speed tab, with enough skill you can even cast instantly! There are many programs, refered to as Buffs, that stick around in your NCU or the NCU of your target after they are cast. Unfortunately your NCU only has so much space to maintain the program, but luckily the amount of NCU space you have can be expanded using Belts and NCU chips. A belt is a computer that primarily opens up belt slots in the weapons tab of your wear window, though many add other bonuses as well. NCU chips can be installed into the enabled belt deck slots to expand how much space you have for buffs. Each buff requires a certain amount of space. Example: Dravet has his Blackmane's Belt Component Platform Equiped and has inserted the chip he got from Stacklund into Slot 1. This gives him a total of 13 NCU space: 8 Natural + 2 from belt bonus + 3 from the chip. |
|
Other Things to Do[]
While the Walkthrough covers most of the major things you need to do on the island before you leave, there are still other things that you could be doing or thinking about while doing the walkthrough.
Tradeskills[]
The process of tradeskilling takes items and combines them them to make new items, many of which are extremely useful or phenomenally powerful. Tradeskilling on newbie island is a good way to get to know the process of tradeskilling without actualy having to make a large investment of the skills involved. Most of the processes on newbie island are covered elsewhere but we will go over one here that is extremely useful: The Salamander Vest.
Materials Needed[]
| Component | *1 | Location | min. QL |
| Antonio's Adaption Factor | C | Vendor: Antonio | - |
| Roller Rat Intensitines | C | Mob Loot: Roller Rat | - |
| Swatch of Salamander Skin | C | Mob Loot:Reef Salamander | - |
- 1 R = reuseable, C = consumed
Creation Process[]
The combination of items in Anarchy Online works as follows:
Open the tradeskill window (Shift-t). Here you can place the two items you want to combine in the left and middle part. The resulting Item will be shown in the right area. Missing skills, or non possible combinations will be shown below. A detailed look on the resulting item is possible with a simple shift-left-click on it. It is recommended to have free inventory space before combining items, else the item will end in the overflow window.
| + |
= |
Skills: None | |||
| Antonio's Adaptation Factory | Rollerrat Intestines | Gut Bowstring | ? | ||
| + |
= |
Skills: None | |||
| Gut Bowstring | Swatch of Salamander Skin | Salamander Vest | ? |
Making Money[]
Making a lot of money outside of the major quests is a difficult proposition, but with some effort it can be done. The first thing that you need to understand is that the armor that comes from the bosses around the island is almost worthless in terms of hard credits. Second, nobody on the island in their right mind would buy anything from the island (except some of the tradeskilled or sided equipment) since they can get it themselves easily. Third, there are four wonderful little items that work as nice 'shop food' that can be found in the course of your killing and leveling.
| Icon | Name | Value | Found |
| Perfectly Formed Seashell | 60 Credits | Beach Mobs | |
| Blue Corundum | 100 Credits | West Beach Mobs | |
| Yellow Corundum | 120 Credits | Any Beach Mob | |
| Melted Circuit Board | 160 Credits | Robotic Mobs (e.g. Waste collectors) |
The Factions[]
There are three factions on Rubi-Ka: Omni-Tek, The Clans, and The Neutrals. Each has its own benefits and detriments in terms of game play. Omni-Tek and the Clans are by far the largest faction, while Neutral is a distant third in terms of population. When you are choosing a faction keep in mind that if you decide to pick a side the only way to go back to being neutral is to delete the character and start over.
Omni-Tek[]
| Omni-Tek is the largest Hypercorperation in the entire universe, and the original colonizer and discoverer of Rubi-Ka and the fantastic properties of Notum. OT signed a several hundred year lease on the planet from the ICC before the total value of notum was understood by the general populace. Omni-Tek values order in its colonies and profits from its enterprises, and fights against the Clans to regain control of the planet. All players who join Omni-Tek represent its group of 'employees' that work in various departments. Outsiders to Omni-Tek often note that it is very overbearing and controling of its employees, demanding almost fanatical loyalty, but OT officials would respond that this is nessicary to keep order and why shouldn't the employees be loyal for everything they have been given?
|
  Omni-Tek Newcomer's Armor |
The Clans[]
| The Clans are a large rebel faction on the planet that represent the ancestors of the first Notum miners that broke with the corperation over inhumane labor practices and a brutal, totalitarian ethic. Over the course of four civil wars, the clans have established themselves in the northern parts of the terraformed zone and fight against OT oppression either through force of arms, diplomacy, or moral conviction. Many people see the Clans as being violent warmongers who simply cause more trouble and conflict on Rubi-Ka than good, the Clans would say that you have to fight to have peace.
|
  Joint Clans Newcomer's Armor |
The Neutrals[]
TheNeutrals are people who abandoned their ties to either side when they became disillusioned by the war. Neutrals today are a wide variety of people who owe their allegiance to neither side, but pursue their own interests. Many Neutrals are go betweens, diplomats, and mercenaries; though there are many that are pacifists and recluses that believe that they should have nothing to do with their side. Neutrals are often times seen as being 'fence-sitters' or cowards for not choosing a side, though many Neutrals would wonder why they have to.
When do I leave?[]
There is some confusion about when and where people should leave the ICC Shuttleport and start their adventures on the mainland. If you leave too early, you will be at a disadvantage because you don't have all the beneficial equipment from the island and its impossible to go back so you wouldn't be able to get that equipment ever again; though if you leave at a latter level your equipment might not be as good on the mainland and it might be hard to find teams. In this section we will look at how to get off the island and the things you need to take with you.
The Checklist[]
Here is a check list of items that you want want at the very least when you leave the island. You should have all these if you followed the walk through, but if you do not than you should get them before you even think about leaving.
| Essential Equipment | Recommended Equipment | ||
| File:16341.png | Level 6 or higher | A suit of Newcomer's Armor that is at or above your level. (Only get armor above your level if you are not joining a faction. Faction armor Quality Level can be upgraded by right-clicking the pieces in your inventory.) | |
| At least one Upgraded Basic Weapon. Two, if you use double weapons like pistols, bats, or tiny swords. The first weapon you can get from Adri Afeli's first quest, another needs to be tradeskilled (edit - you can take a second group of the same items and a second weapon and adri will give you a second upgraded weapon.) | The Salamander Vest, which is made through a tradeskill process | ||
| Your profession's Nano Program Container from the Newcomer's Nano Programs Terminal | The Small Backpack from Adri Afeli's second quest | ||
| Blackmane's Belt Component Platform which you get by showing the belt you get after doing Brandon Thorn's quests to Vendor Antino Stacklund | About 100 Healing and Nano Kits which can be gotten from Brandon Thorn by giving him three monster parts four times. | ||
| The Light Bar from Brandon Thorn's first quest | 10,000 credits or more. | ||
| The Shiny Band which is from the ICC Bio-Inspector's first quest | |||
| A Range Meter which can be had from the ICC Bio-Inspector's second quest, or tradeskilled | |||
| Around 5,000 Credits |
Leaving[]
| When you have everything that you want to take with you and have done everything that you want to do, its time to leave the island. In order to do that you need to have a teleport key from one of the three fraction representatives: The Omni-Tek Recruiter, The Clan Recruiter, or The Neutral Observer. To get a key from the Omni-Tek and Clan reps, you need to join their faction, since they will be paying for your trip to their city; the Neutral rep will just give you the key out of the kindness of his heart. Each of the representatives will also give you a set of starting maps for the sided territory you go to, and an empty merit board if you are Clan or Omni. Dravet decided that we should stay Neutral, because he thinks that it would be the best chance to shoot the most number of people. We also decided that would be a good idea because though we saw a lot of people here feeding us the line their faction gave them, it may be different once we see how real members of the other factions behave. Once you have your key you can enter the tower and go to the appropriate teleporter, Clan goes to Athens on the left, Neutrals go to Borealis in the middle, and Omnis go to Rome on the Right. Take your key and right click it on the access box and you will teleport to the mainland to begin your adventures! |
|
What Next?[]
Looking for what to do next? You could do any of the following:
- Explore the dangerous Condemned Subway!
- Run mercenary Missions!
- Try some Quests!
- Duel other players in PvP Combat!
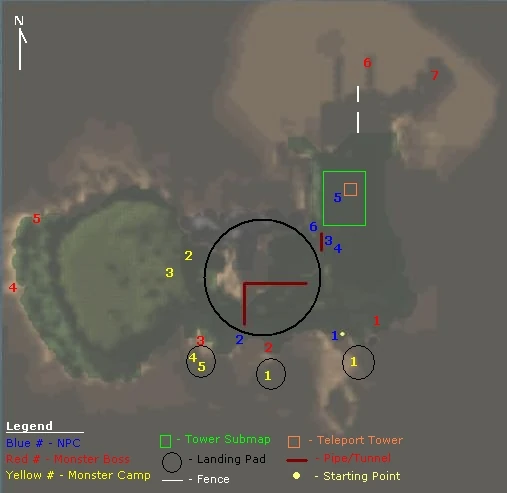
Maps[]
To see an enlarged version of the map, simply click on the map.
 |
|
| Quest NPCs (Blue) | Monster Leaders (Red) | Monster Camps (Yellow) |
|
|
|
Other Guides[]
If this guide didn't help you these others cover the same material